DIY Plumbing Repairs: Fix Leaky Faucets & Toilets for Savings

DIY Plumbing Repairs: Fix Leaky Faucets and Toilets and Save $100 on Plumber Bills delves into practical, cost-effective methods for homeowners to address common plumbing issues, such as leaky faucets and running toilets, providing step-by-step guidance to avoid expensive professional services and save money on utility bills.
Tired of dripping faucets and constantly running toilets? Discover how DIY Plumbing Repairs: Fix Leaky Faucets and Toilets and Save $100 on Plumber Bills can empower you to tackle these common household problems, saving you money and the hassle of waiting for a plumber.
The Benefits of DIY Plumbing Repairs
Embarking on DIY plumbing repairs can be incredibly rewarding. Not only do you save money on expensive plumber bills, but you also gain valuable skills and a sense of accomplishment.
With the right tools and a bit of know-how, many common plumbing issues are well within the capabilities of the average homeowner. Let’s explore why DIY plumbing is worth considering.
Cost Savings
The most obvious benefit is the significant cost savings. Plumbers often charge high hourly rates, plus the cost of parts. By doing it yourself, you only pay for the necessary materials.
Convenience and Speed
Waiting for a plumber can be a hassle, especially for minor issues. DIY repairs allow you to fix problems on your own schedule, often much faster than scheduling a professional.
- Avoid expensive plumber call-out fees.
- Fix problems immediately without waiting for an appointment.
- Save money on utility bills by addressing leaks promptly.
Mastering simple plumbing repairs can also boost your confidence and self-reliance. Knowing you can handle common household issues provides a sense of security.
Additionally, DIY repairs allow you to customize solutions to your specific needs and preferences. You can choose the exact parts and materials you want to use.
In conclusion, DIY plumbing offers substantial cost savings, convenience, and a sense of empowerment. It’s a skill that can benefit homeowners for years to come.
Essential Tools and Materials for DIY Plumbing
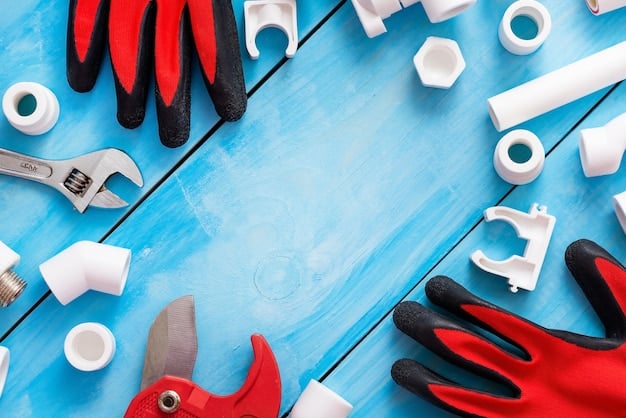
Before diving into any plumbing project, it’s essential to have the right tools and materials on hand. Having these items readily available will make the job smoother and more efficient.
Let’s take a look at some must-have tools and materials for basic DIY plumbing repairs, ensuring you’re well-prepared for any task.
Basic Plumbing Tools
A few essential tools are needed for most plumbing repairs. These tools will help you disassemble, repair, and reassemble plumbing fixtures.
Common Plumbing Materials
Having a selection of common plumbing materials on hand can save you time and trips to the hardware store. These materials are often needed for quick fixes and replacements.
- Adjustable wrench: For loosening and tightening nuts and bolts.
- Plunger: Essential for unclogging toilets and drains.
- Plumber’s tape (Teflon tape): For sealing threaded connections.

Consider investing in a basic plumbing toolkit that includes these essential items. This will ensure you have everything you need for most common repairs.
Also, it’s important to have a good flashlight or headlamp to illuminate dark areas under sinks and in cabinets. Proper lighting can make a big difference in the ease of the repair.
In summary, assembling a basic toolkit with essential tools and materials is crucial for successful DIY plumbing repairs. Being prepared will save you time and frustration.
Fixing a Leaky Faucet: A Step-by-Step Guide
A leaky faucet is a common household problem that can waste water and increase your utility bills. Fortunately, fixing a leaky faucet is often a straightforward DIY project.
This step-by-step guide will walk you through the process of diagnosing and repairing a leaky faucet, saving you money and water.
Diagnosing the Problem
Before you start, identify the type of faucet you have (e.g., compression, cartridge, ball, or ceramic disc). Each type requires a slightly different repair approach.
Step-by-Step Repair Process
Follow these steps to fix a leaky faucet, ensuring you have the necessary tools and materials on hand.
- Turn off the water supply: Locate the shut-off valves under the sink and turn them off.
- Disassemble the faucet: Carefully remove the handle, spout, and other components, noting the order in which they come apart.
- Replace worn parts: Common culprits include O-rings, washers, and cartridges. Replace any worn or damaged parts with new ones.
Once you’ve replaced the worn parts, reassemble the faucet in the reverse order. Ensure all components are properly aligned and tightened.
After reassembly, turn on the water supply slowly and check for leaks. If the faucet still leaks, double-check that all parts are correctly installed and tightened.
By following these steps, you can effectively fix a leaky faucet and prevent further water waste. Regular maintenance can also help prevent future leaks.
Repairing a Running Toilet: A Simple Solution
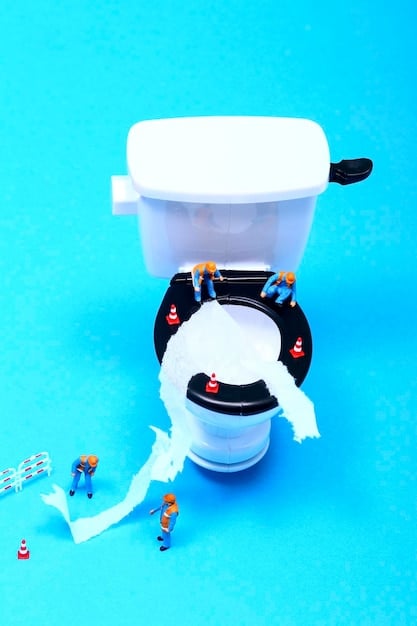
A running toilet can waste a significant amount of water, leading to higher water bills. Fortunately, fixing a running toilet is often a simple DIY task.
This guide will provide you with the knowledge and steps to diagnose and repair a running toilet, saving you water and money.
Identifying the Cause
The most common causes of a running toilet include a faulty flapper, fill valve problems, or an improperly adjusted float.
Step-by-Step Repair Process
Follow these steps to repair a running toilet, making sure to have the necessary tools and materials available.
- Check the flapper: The flapper is the rubber seal at the bottom of the tank. If it’s worn or damaged, replace it.
- Adjust the fill valve: The fill valve controls the water level in the tank. Adjust it so that the water stops filling before it reaches the overflow tube.
- Inspect the float: The float controls the fill valve. Ensure it moves freely and isn’t damaged.

After making these adjustments and replacements, flush the toilet to check if the problem is resolved. If the toilet continues to run, repeat the steps or consider replacing the entire fill valve assembly.
Regular maintenance and prompt repairs can prevent water wastage and keep your toilet functioning efficiently. By addressing these issues yourself, you can save on water bills and plumber fees.
In conclusion, repairing a running toilet is a straightforward DIY project that can save you water and money. By identifying the cause and following the repair steps, you can resolve this common plumbing issue.
Preventative Plumbing Maintenance Tips
Preventative maintenance is key to avoiding costly plumbing repairs and ensuring your plumbing system functions efficiently. Regular check-ups and simple tasks can save you time and money in the long run.
Here are some essential preventative plumbing maintenance tips that every homeowner should follow, ensuring a trouble-free plumbing system.
Regular Inspections
Periodically inspect your plumbing fixtures and pipes for leaks, corrosion, and other signs of damage. Early detection can prevent minor issues from becoming major problems.
Drain Maintenance
Keep your drains clear of debris and grease. Use drain screens to catch hair and food particles, and avoid pouring grease down the drain.
- Flush drains with hot water periodically to prevent build-up.
- Use drain screens to catch hair and debris.
- Avoid pouring grease down the drain.
Consider using enzyme-based drain cleaners to break down organic matter without damaging your pipes. Avoid chemical drain cleaners, as they can corrode pipes over time.
Also, insulate exposed pipes in unheated areas to prevent freezing during cold weather. Frozen pipes can burst, causing extensive water damage.
By following these preventative maintenance tips, you can extend the life of your plumbing system and avoid costly repairs. Regular care can make a significant difference in the longevity and efficiency of your plumbing.
When to Call a Professional Plumber
While many plumbing issues can be resolved with DIY repairs, some problems require the expertise of a professional plumber. Knowing when to call a plumber can prevent further damage and ensure the job is done correctly.
Here are some situations where it’s best to call a professional plumber, ensuring the safety and integrity of your plumbing system.
Major Leaks and Flooding
If you experience a major leak or flooding, it’s crucial to call a plumber immediately to prevent water damage to your home. These situations often require specialized equipment and expertise.
Complex Plumbing Issues
Some plumbing problems, such as sewer line issues or extensive pipe damage, are too complex for DIY repairs. A professional plumber has the knowledge and tools to handle these situations effectively.
- Sewer line backups or blockages.
- Extensive pipe damage or corrosion.
- Water heater malfunctions.
Also, if you’re uncomfortable or unsure about any plumbing repair, it’s always best to call a professional. Making a mistake can lead to further damage and higher repair costs.
Consider developing a relationship with a trusted local plumber. Having a reliable professional to call in case of emergencies can provide peace of mind.
In summary, while DIY plumbing repairs can save you money, it’s important to know when to call a professional plumber. Recognizing the limitations of DIY and seeking expert help when needed can protect your home and plumbing system.
| Key Point | Brief Description |
|---|---|
| 🛠️ Essential Tools | Adjustable wrench, plunger, plumber’s tape are crucial for basic repairs |
| 🚰 Leaky Faucet Fix | Turn off water, disassemble, replace worn parts, reassemble carefully |
| 🚽 Running Toilet Repair | Check flapper, adjust fill valve/float; replace parts if needed |
| 💧 Preventative Tips | Inspect regularly, maintain drains, insulate pipes to prevent issues. |
FAQ
▼
Essential tools include an adjustable wrench, plunger, plumber’s tape (Teflon tape), pliers, and a screwdriver. Having these on hand will cover most minor issues.
▼
Look under the sink for two shut-off valves, one for hot water and one for cold water. Turn these valves clockwise until they are completely closed to stop the water flow.
▼
Common causes include a faulty flapper that doesn’t seal properly, a fill valve that’s not shutting off, or a float that’s set too high. Replacing or adjusting these parts usually fixes the problem.
▼
It’s generally best to avoid chemical drain cleaners, as they can corrode pipes and cause more damage in the long run. Enzyme-based cleaners or a drain snake are safer alternatives.
▼
Call a plumber for major leaks, sewer line issues, extensive pipe damage, or if you’re uncomfortable with the repair. It’s better to be safe than sorry when dealing with complex plumbing problems.
Conclusion
Taking on DIY plumbing repairs can save you a significant amount of money and equip you with valuable skills. By following these tips and guidelines, you can confidently tackle leaky faucets and running toilets, keeping your plumbing system in top shape and your wallet a little fuller. Remember to always prioritize safety and know when it’s best to call in a professional for more complex issues.


