DIY Furniture Refurbishing: Save Money & Revive Old Furniture

DIY furniture refurbishing is a cost-effective way to transform old, worn-out pieces into stylish, updated items, saving hundreds of dollars on replacements while adding a personal touch to your home décor.
Is your furniture looking a little worse for wear? Instead of heading to the store and spending a fortune on new pieces, consider DIY furniture refurbishing. It’s a fantastic way to give your old furniture new life, express your creativity, and save hundreds of dollars in the process.
Refurbishing Furniture: A Savvy Saving Strategy
Refurbishing furniture isn’t just a fun project; it’s a smart financial move. Instead of contributing to landfill waste and spending potentially thousands on new furniture, you can transform your existing pieces into something beautiful and functional for a fraction of the cost. Let’s explore why furniture refurbishing is a savvy way to save money.
* Reduced spending: Refurbishing significantly reduces the need to buy new furniture.
* Upcycling: It promotes sustainability by reusing materials.
* Customization: Gives you the freedom to customize your furniture to match your personal style.
Financial Benefits of Refurbishing
Beyond the satisfaction of creating something new, refurbishing furniture offers several financial advantages. Let’s examine some practical ways to make the most impact with furniture refurbishing.
- Lower initial costs: Refurbishing materials are typically less expensive than purchasing new furniture.
- Increased Furniture Lifespan: Regular maintenance and restoration can dramatically extend the life of your furniture, preventing premature replacement.
- Avoid Depreciation: As soon as you buy new furniture, it starts to depreciate in value. Refurbishing avoids taking a loss and maintains the sentimental value of your furniture.
By choosing to refurbish, you can save money, reduce waste, and add unique pieces to your home decor. It’s a win-win!
Getting Started: Necessary Tools and Materials
Before diving into your first refurbishing project, it’s essential to gather the necessary tools and materials. Having everything at hand will make the process smoother and help you achieve professional-looking results. Here’s a comprehensive list to get you started.
* Sandpaper: Essential for smoothing surfaces and preparing them for paint or stain.
* Primer: Ensures better adhesion and a uniform finish for your topcoat.
* Paint or Stain: Choose colors and finishes that match your personal style and project needs.
Essential Tools and Equipment
Equipping yourself with the right tools can make a huge difference in the quality of your finished product. Here are a few necessary tools to start DIY furniture refurbishing:
- Safety Gear: Always wear gloves, safety glasses, and a mask to protect yourself from dust and chemicals.
- Screwdrivers and Wrenches: For disassembling and reassembling furniture pieces.
- Paintbrushes and Rollers: High-quality brushes and rollers ensure a smooth and even application of paint or stain.
With the right tools and materials, you’ll be well-prepared to tackle a wide range of furniture refurbishing projects. Get ready to transform your old furniture into stunning pieces that reflect your unique style.
Basic Refurbishing Techniques: From Sanding to Staining
Mastering basic refurbishing techniques is fundamental to achieving professional-looking results. These techniques include everything from surface preparation to applying the final finish. Let’s explore some essential steps for furniture refurbishing.
* Cleaning: Thoroughly clean the surface to remove dirt, grime, and old finishes.
* Repairing: Fix any structural damage, such as loose joints or broken pieces.
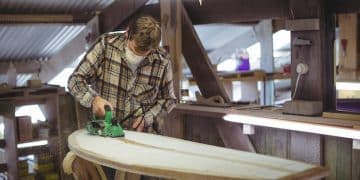
* Sanding: Smooth the surface to create a clean base for painting or staining.

Step-by-Step Sanding Guide
Sanding is a crucial step in preparing your furniture for a new finish. Here’s how to do it right:
- Choose the Right Grit: Start with a coarse grit sandpaper (80-120) to remove old finishes, then move to a medium grit (150-180) to smooth the surface. Finish with a fine grit (220+) for a super smooth finish.
- Sand with the Grain: Always sand in the direction of the wood grain to avoid scratching the surface.
- Dust Removal: After sanding, thoroughly remove dust with a tack cloth or a damp cloth.
By applying these essential techniques, you can transform old, worn-out furniture into beautiful, revitalized pieces. Practice makes perfect, so don’t be afraid to experiment and refine your skills.
Painting Techniques for a Flawless Finish
Painting is one of the most transformational ways to refurbish furniture. Achieving a flawless finish requires attention to detail and using the right painting techniques. Here are some tips to help you get started. Preparation is key in any process, read on and see the options!
* Choosing the Right Paint: Select a paint that is appropriate for the type of furniture and the desired finish.
* Priming: Apply a primer to enhance adhesion and block stains.
* Application: Use smooth, even strokes to achieve a uniform finish.
Achieving an Even Coat
Achieving an even paint coat is essential for a professional look. Here are some tips to help you avoid common pitfalls:
- Use High-Quality Brushes or Rollers: Invest in quality tools for a smoother application and fewer brush strokes.
- Apply Thin Coats: Multiple thin coats are better than one thick coat to prevent drips and unevenness.
- Sand Between Coats: Lightly sand between coats to remove any imperfections and create a smooth surface for the next coat.
With practice and patience, you can master these techniques and create beautifully painted furniture that looks professionally done.
Adding Unique Touches: Hardware and Embellishments
The details often make the biggest difference in furniture refurbishing. Adding unique hardware and embellishments can elevate your refurbished pieces from simple upgrades to statement pieces. Let’s explore some creative ideas.

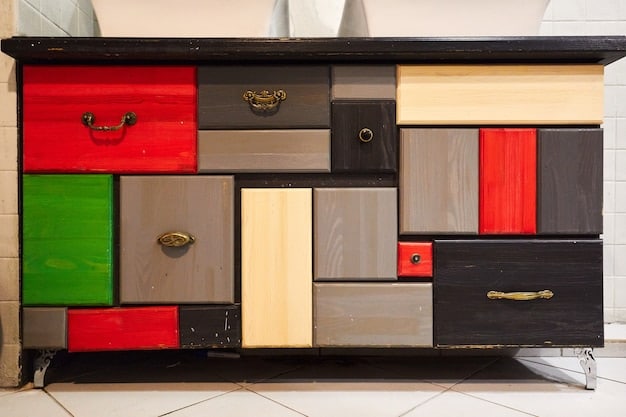
* Choosing New Hardware: Upgrade old knobs, pulls, and handles to transform the look of your furniture.
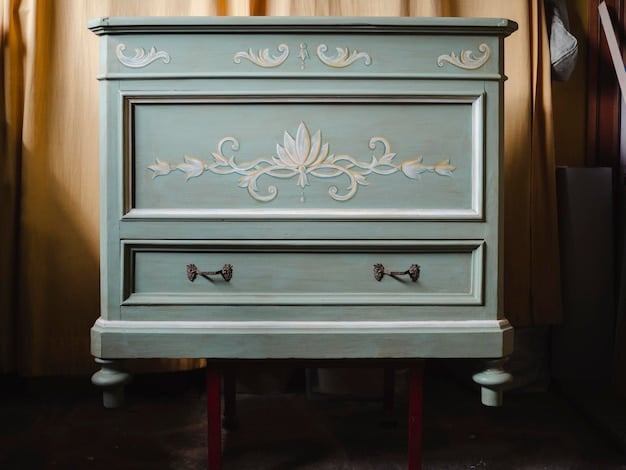
* Adding Decorative Elements: Incorporate stencils, decals, and moldings to add personality and charm.
* Creating Custom Finishes: Experiment with distressing, antiquing, and other unique finishes to create one-of-a-kind pieces.
Creative Embellishment Ideas
Here are more creative embellishment ideas to make your refurbished furniture truly special:
- Stenciling: Use stencils to add intricate patterns and designs to your furniture.
- Distressing: Create a vintage look by lightly sanding edges and corners to reveal the underlying layers.
- Decoupage: Apply decorative papers or fabrics to the surface of your furniture for a unique and personalized touch.
By adding unique hardware and embellishments, you can transform your refurbished furniture into stunning pieces that reflect your personal style and creative vision.
Saving Money Long-Term: Maintenance and Care Tips
Once you’ve put in the effort to refurbish your furniture, it’s essential to maintain and care for it properly to ensure its longevity. Regular maintenance can prevent damage and keep your pieces looking their best. Let’s look at how to take care of your furniture.
Protecting Your Investment
Here are a few quick tips for protecting your investment:
- Regular Cleaning: Dust your furniture regularly with a soft cloth to prevent dirt and grime buildup.
- Protect from Sunlight: Position your furniture away from direct sunlight to prevent fading and discoloration.
- Use Coasters and Placemats: Protect surfaces from scratches, stains, and heat damage by using coasters and placemats.
By following these maintenance and care tips, you can keep your refurbished furniture looking beautiful for years to come, saving you money on replacements and ensuring your pieces remain a treasured part of your home.
| Key Point | Brief Description |
|---|---|
| 🔨 Saving Money | Refurbishing can save hundreds on new furniture. |
| 🛠️ Essential Tools | Safety gear, sandpapers, paint brushes are key. |
| 🎨 Painting Techniques | Proper priming and thin coats ensure a smooth finish. |
| ✨ Unique Touches | New hardware and distress techniques can add character. |
Frequently Asked Questions
▼
Start with a thorough cleaning to remove dirt and grime. Next, assess the furniture for any necessary repairs, such as loose joints or broken pieces, before moving on to sanding and painting.
▼
Consider the type of furniture and the desired finish. For wood furniture, opt for latex or enamel paints. Chalk paint is excellent for creating a distressed look, and always select a paint specifically designed for furniture.
▼
Always wear safety glasses to protect your eyes from dust and debris. Use gloves to protect your hands from chemicals and paints, and wear a mask or respirator to avoid inhaling harmful particles during sanding or painting.
▼
▼
Consider adding new hardware, such as decorative knobs or pulls. Stenciling, decoupage, or adding moldings can also give your furniture a unique touch. Let your imagination run wild and personalize your pieces to your taste.
Conclusion
By embracing DIY furniture refurbishing, you can breathe new life into old pieces, save money, and express your creativity. With the right tools, techniques, and a little imagination, you can transform your home decor and enjoy the satisfaction of creating something beautiful and unique.


